Sion Reroll
Primary
Tier
2-Cost Reroll
1-Cost Reroll
2-Cost Reroll
3-Cost Reroll
Fast 8
Fast 9
1 & 2-Cost Reroll
1 & 3-Cost Reroll
2 & 3-Cost Reroll
 123
123
Main
▾
Traits

6
Bruiser
2 > 4 > 6
1
Targon
1

1
Caretaker
1
1
The Boss
1

3
Ionia
3 > 5 > 7 > 10

1
Bilgewater
3 > 5 > 7 > 10
1
Freljord
3 > 5 > 7
1
Invoker
2 > 4
1
Noxus
3 > 5 > 7 > 10
1
Yordle
2 > 4 > 6 > 8 > 10
6
1
1
1
3
1
1
1
1
1
Tips & Tricks
- You can only play this comp if you unlock Bard, which requires rolling before the Stage 2 carousel. Augments that help you roll before carousel like Trade Sector are particularly valuable as they allow you to unlock him without giving up much econ
- Bruiser Emblem allows you to play 6 Bruiser + Aphelios + Bard + Sett on level 8 which is convenient, but is not as impactful once you get to 9. Level 9 is rare in this comp though so it is worth considering.
- Item augments are high value in this line as you want to fully itemize Sion, Bard, and Aphelios as soon as possible
Strong Conditions
+3 Tier Conditions B → S+
+2 Tier Conditions B → S
+1 Tier Conditions B → A
Openers
Bruiser Bard
 Illaoi
 Shen
Shen Bard Sion
 Dr. Mundo
1

4
 Aphelios
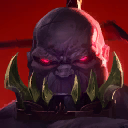
Sion
Aphelios
Sion
Targon
Aphelios
 2
2
Current
Best-in-Slot
Alt Build 1
Alt Build 2
Alt Build 3
Alt Build 4
Alt Build 5
Economy Strategy
- Level to 4 if you have upgrades and a good item to place on one of those upgrades.
- Level to 5, unless on 3 loss streak.
- Level to 6. Roll until stable. “Stable” changes depending on rank, items, augments, composition, and patch, but generally speaking it involves 2-starring your desired 2-cost carry and a tank with items. Major divergence between elos: The lower your elo, the less upgrades you need to be “stable” and thus lower elo players should generally roll less than high elo players on 3-2.
- After your 3-2 rolldown, you should attempt to rebuild your economy to 50g.
- Once you reach 50g (it might be later than 3-5), start slow rolling down to ~52g each turn. Try to avoid rolling to exactly 50g as any unit you want to buy in shop will put you below 50g.
- If you are high HP relative to the lobby, continue slow rolling to 52g each turn. If you are lower HP, you should roll to hit your first 2-cost 3 star on 4-1 or 4-2. If you have to roll below 30g, your placement is usually capped at 3rd or 4th.
- If you are still high HP (70+), you can continue to slow roll. Otherwise, in the majority of cases, you should roll deep for your 3-stars here. If your HP is low, you can even go to 0 gold looking for your 3-stars. If you have your 3-stars and can afford to level to 7 with 10g+, do so.
- Level to 7 if you haven’t already.
- Level to 8 as soon as possible. This may not happen until 5-5 or in some games, stage 6.
- Level to 9 whenever possible. This is rare, but can happen in the games you have a chance of winning.
What the fuck i do when i forgott the bard? xd
pivot to ryze? idk thats a big thing to do
No scout no pivot is S+ tier with this, you can start off with shen and illaoi even if you don’t find sion or mundo at all, you can easily roll for bard and have aphelios and not worry about what you field, you keep your units for the entire game and easily have some huge stats with little to no drawback, only thing you should worry about with No Scout No Pivot is to have an empty bench at lvl 8 so you can actually field volibear once you unlock him, but that’s also pretty easy because I’m always win streaking and healthy with that augment on this build. One more note you could add a heart of steel sion build (I suggest steadfast heart, gargoyle and a spirit visage) and I personally think, with a lot of games that with HOS this is an S build, not A. Also consider Ascension augment being at least A tier here, had multiple games with it, damage amp with a huge frontline and also a gunblade on aphelios is absolutely broken.
Thanks for the idea, will try this!
Would heavily, HEAVILY consider moving this to unplayable tier- average game in current meta has 4+ Fizz players, it is an instant loss even against 1 star Fizz with 1 item, also Sona has full map targeting with her ability, even if you have a 90 billion hp Sion she will just snipe everyone else on the board and eventually kill Sion, the augments / items / conditions really don’t matter in current meta, you just lose
Trinity + (15% health of all the front line) is A+ at least
Sunfire, helps his takedown counts so consider this as an early slam?
You should include hefty rerolls as A tier condition
I think decently of the Seraphim’s Staff if you have archangel slam 2-1. With the augment, 2 archangels on bard gives him 4 mana regen at the start of combat if you pair them with another ap item like Void Staff or Jeweled Gauntlet. Before you get the 3rd bard item it’s still quite good because you get the bonus mana regen 5 seconds into the fight. With the bonus mana regen he only needs 3 autos to cast again
lowkey good if u hit sion 2 early and win streak
‘Alt Build 2’ for Sion is the same as his ‘Current’ build.
in comps like these, should we focus on itemizing 1 carry and tank, or 2 carries and later itemize tank with the leftovers?
Talisman shouldn’t be OP. Zilean exists.
How does 2-Roll work? I get to level6 and than do I roll until zero Gold? Or to keep economy, I only roll 10 gold down and wait for income next round? and repeat it with 10gold again and again? Could you write a short guide on this please? Sorry, I am a new player and would like to try it out
the econ guide is there: economy strategy 🙂
you roll on level 6 ideally while your gold is above 50😁
Shouldn’t Spirit Link be a +1 for this one?
Yes, might even be +2 but added it at +1 to be safe until I see some games with it. Thanks!
it works pretty good with heavy is the crown as well
hefty rolls is REALLY strong with this comp
Wood Axiom should be +1 tier probably
wood axiom is bugged rn and the 15% disappears at the start of combat
Current and Alt Build 2 on Sion are the same thing.
It’s not actually the same — Alt Build 2 is Radiant Spirit Visage rather than normal craftable Spirit Visage. Why do they look the exact same? Because Riot recently changed how they handled Radiant and Artifact images. They used to provide the special framing in the image for the item. Now they don’t and instead programmatically add the frame based on item type. I haven’t coded the logic to do the same yet, especially since it is only done for newer items. Will have to get around to it at some point.
Hefty Rolls seemed to work really well with this comp for me!
for 4* sion sunfire isnt necessary to get 4k+ bonus passive health, if you get worth the wait this comp is pretty nice
hellfire hatchet looks pretty good on the stats, but not on slayers or bel veth. Probably better to go bruisers and itemize voli instead of going slayers when getting this artifact.