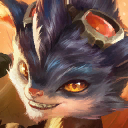
Artillery Barrage Rumble
Primary
Tier
Required
Fast 8
1-Cost Reroll
2-Cost Reroll
3-Cost Reroll
Fast 8
Fast 9
1 & 2-Cost Reroll
1 & 3-Cost Reroll
2 & 3-Cost Reroll
 132
132
Main
▾
Traits

8
Yordle
2 > 4 > 6 > 8 > 10

2
Arcanist
2 > 4 > 6
2
Defender
2 > 4 > 6
2
Juggernaut
2 > 4 > 6
2
Longshot
2 > 3 > 4 > 5

1
Bilgewater
3 > 5 > 7 > 10
1
Bruiser
2 > 4 > 6
1
Demacia
3 > 5 > 7 > 11
1
Invoker
2 > 4
1
Ionia
3 > 5 > 7 > 10
1
Noxus
3 > 5 > 7 > 10
1
Zaun
3 > 5 > 7
8
2
2
2
2
1
1
1
1
1
1
1
Tips & Tricks
- Rumble wants a Rageblade + some combination of Archangel, Rabadon’s, Jeweled Gauntlet, or Giant Slayer. Can also build a second Rageblade.
- Rabadon’s is especially good because it unlocks Veigar in Patch 16.6 (no longer need two of them).
- Do not reroll for Rumble 3. Can roll for Rumble 2 if you don’t have yet by 3-1 (ideally you should only take this augment with Rumble 2 already). Push to level 8 so you can get the 8 Yordle rewards
Strong Conditions
+3 Tier Conditions B → S+
+2 Tier Conditions B → S
+1 Tier Conditions B → A
Openers
Yordle
 LuluRumble
 Neeko
Neeko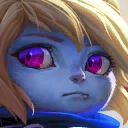 Poppy
Poppy  Teemo
Teemo
4
2
2
Rumble
Teemo

Defender
Yordle
Rumble
 1
1
Current
Best-in-Slot
Alt Build 1
Alt Build 2
Alt Build 3
Alt Build 4
Alt Build 5
Economy Strategy
- Level to 4 if you have upgrades and a good item to place on one of those upgrades.
- Level to 5, unless on 3 loss streak.
- Level to 6 if on 4+ win streak (scout to see if necessary in high elo) or can stay above 40g.
- Level to 6, unless you would go below 30g. If you have to stay level 5 due to low gold (rare), then level to 6 on 3-5.
- Level to 7 if you can stay above 30g, otherwise stay level 6.
- Level to 7.
- Level to 8. Roll for desired comp until stable. “Stable” changes depending on rank, items, augments, composition, and patch. Melee carries and tanks get the biggest spike for 2-stars. Usually stable involves 2-star tank or carry and some other supporting 2-stars. Try not to roll below 10g.
- If you are weak (e.g., have no 2-star 4-costs), consider rolling again to 10g here. If you are stable, save gold to go 9.
- If you are low HP and haven’t 2-starred your carry and tank, roll to 0g. If you have medium to high HP with an upgraded + itemized 4-cost unit and some other upgrades, save gold to go 9.
- If high HP, consider waiting until 5-5 to go level 9. If medium HP, consider going level 9 if you can roll 20g or wait until 5-5. If low HP and can afford to go 9, do so even if you have almost no gold to roll on 9. If you can’t afford to go 9 this game, roll every turn for upgrades.
- Level to 9 if possible. From this point onward, look to level to 9. Acknowledge games where level 9 is not possible and roll every turn on 8 to preserve placements.
- For max cap games, you can either roll on 9 or level to 10. If you are itemizing a 5-cost carry and it is 1-starred, roll on 9. If you have all your main itemized units upgraded, level to 10.
It’s only good with artifacts
Went first place with Deadlier caps. I lost hard lategame, but had enough hp for the other 2 guys to kick each other out.
Double guinsoos made rumble go NYE celebration stryle with a 160% stacked rabadons lategame
Went 3rd, can’t complain!
With staff overflow it’s really strong. Otherwise shit.
this comp is fast 8th
I did multiple good games with this augment. In my opinion Gunblade is top tier item in this comp, helps wins so many rounds with a bulky Kennen/Poppy.
Ziggs 2 star was a surprisingly good unit in my experience too, I didn’t trust him but I think he is pretty much the win condition in this comp.
I tried taking this augment without any Guinsoo component and it was really sus.
do not play this please
fastest 8 I ever did lol
E tier. Needs a buff ASAP. It was a miracle I got 5th with it in silver lobby.
i think D tier is generous